> ## Documentation Index
> Fetch the complete documentation index at: https://docs.papermap.ai/llms.txt
> Use this file to discover all available pages before exploring further.
# Visual quickstart
> Create a project, prompt, active agent, and first run in the AIR staging console.
In about ten minutes, you will create an active agent and see its first run in
the AIR trace viewer. You do not need a model-provider key for the staging smoke
test.
Select a screenshot to zoom. The screenshots use a disposable staging project
and contain no API keys or provider credentials.
## Before you begin
* Python 3.10 or newer
* Access to the [AIR staging console](https://dev.air.papermap.ai)
* A model-provider key only when you are ready to use a real OpenAI or Anthropic model
Sign in, select **New project**, enter a descriptive name, and select
**Create project**. A project is the boundary for agents, tools, members,
keys, and provider credentials.
 Open **Prompts**, select **New prompt**, and name it `Support assistant`.
Open the prompt, select **New version**, and enter:
```text theme={null}
You are a concise support assistant. Answer using the information in the
run input. If information is missing, explain what you need.
```
Add a short change note and create the version.
Open **Prompts**, select **New prompt**, and name it `Support assistant`.
Open the prompt, select **New version**, and enter:
```text theme={null}
You are a concise support assistant. Answer using the information in the
run input. If information is missing, explain what you need.
```
Add a short change note and create the version.
 Open **Agents**, select **New agent**, and name it `Support agent`. Reuse the
prompt version you just created.
For the first staging smoke test, choose **Bring your own provider key**,
then select **Testing** and **fake-echo**. This built-in model requires no
key. Leave **Activate immediately** selected and choose **Create & start
serving**.
Open **Agents**, select **New agent**, and name it `Support agent`. Reuse the
prompt version you just created.
For the first staging smoke test, choose **Bring your own provider key**,
then select **Testing** and **fake-echo**. This built-in model requires no
key. Leave **Activate immediately** selected and choose **Create & start
serving**.
 For real responses, choose OpenAI or Anthropic and connect the project
provider key when prompted. Keys are encrypted and never shown again.
In the agent's **Try it** panel, enter `When does support open?` and select
**Run test**. The **Output · streaming** panel appears after the first model
chunk and grows while the run is active. The transcript records the same
event sequence without changing the active configuration.
For real responses, choose OpenAI or Anthropic and connect the project
provider key when prompted. Keys are encrypted and never shown again.
In the agent's **Try it** panel, enter `When does support open?` and select
**Run test**. The **Output · streaming** panel appears after the first model
chunk and grows while the run is active. The transcript records the same
event sequence without changing the active configuration.
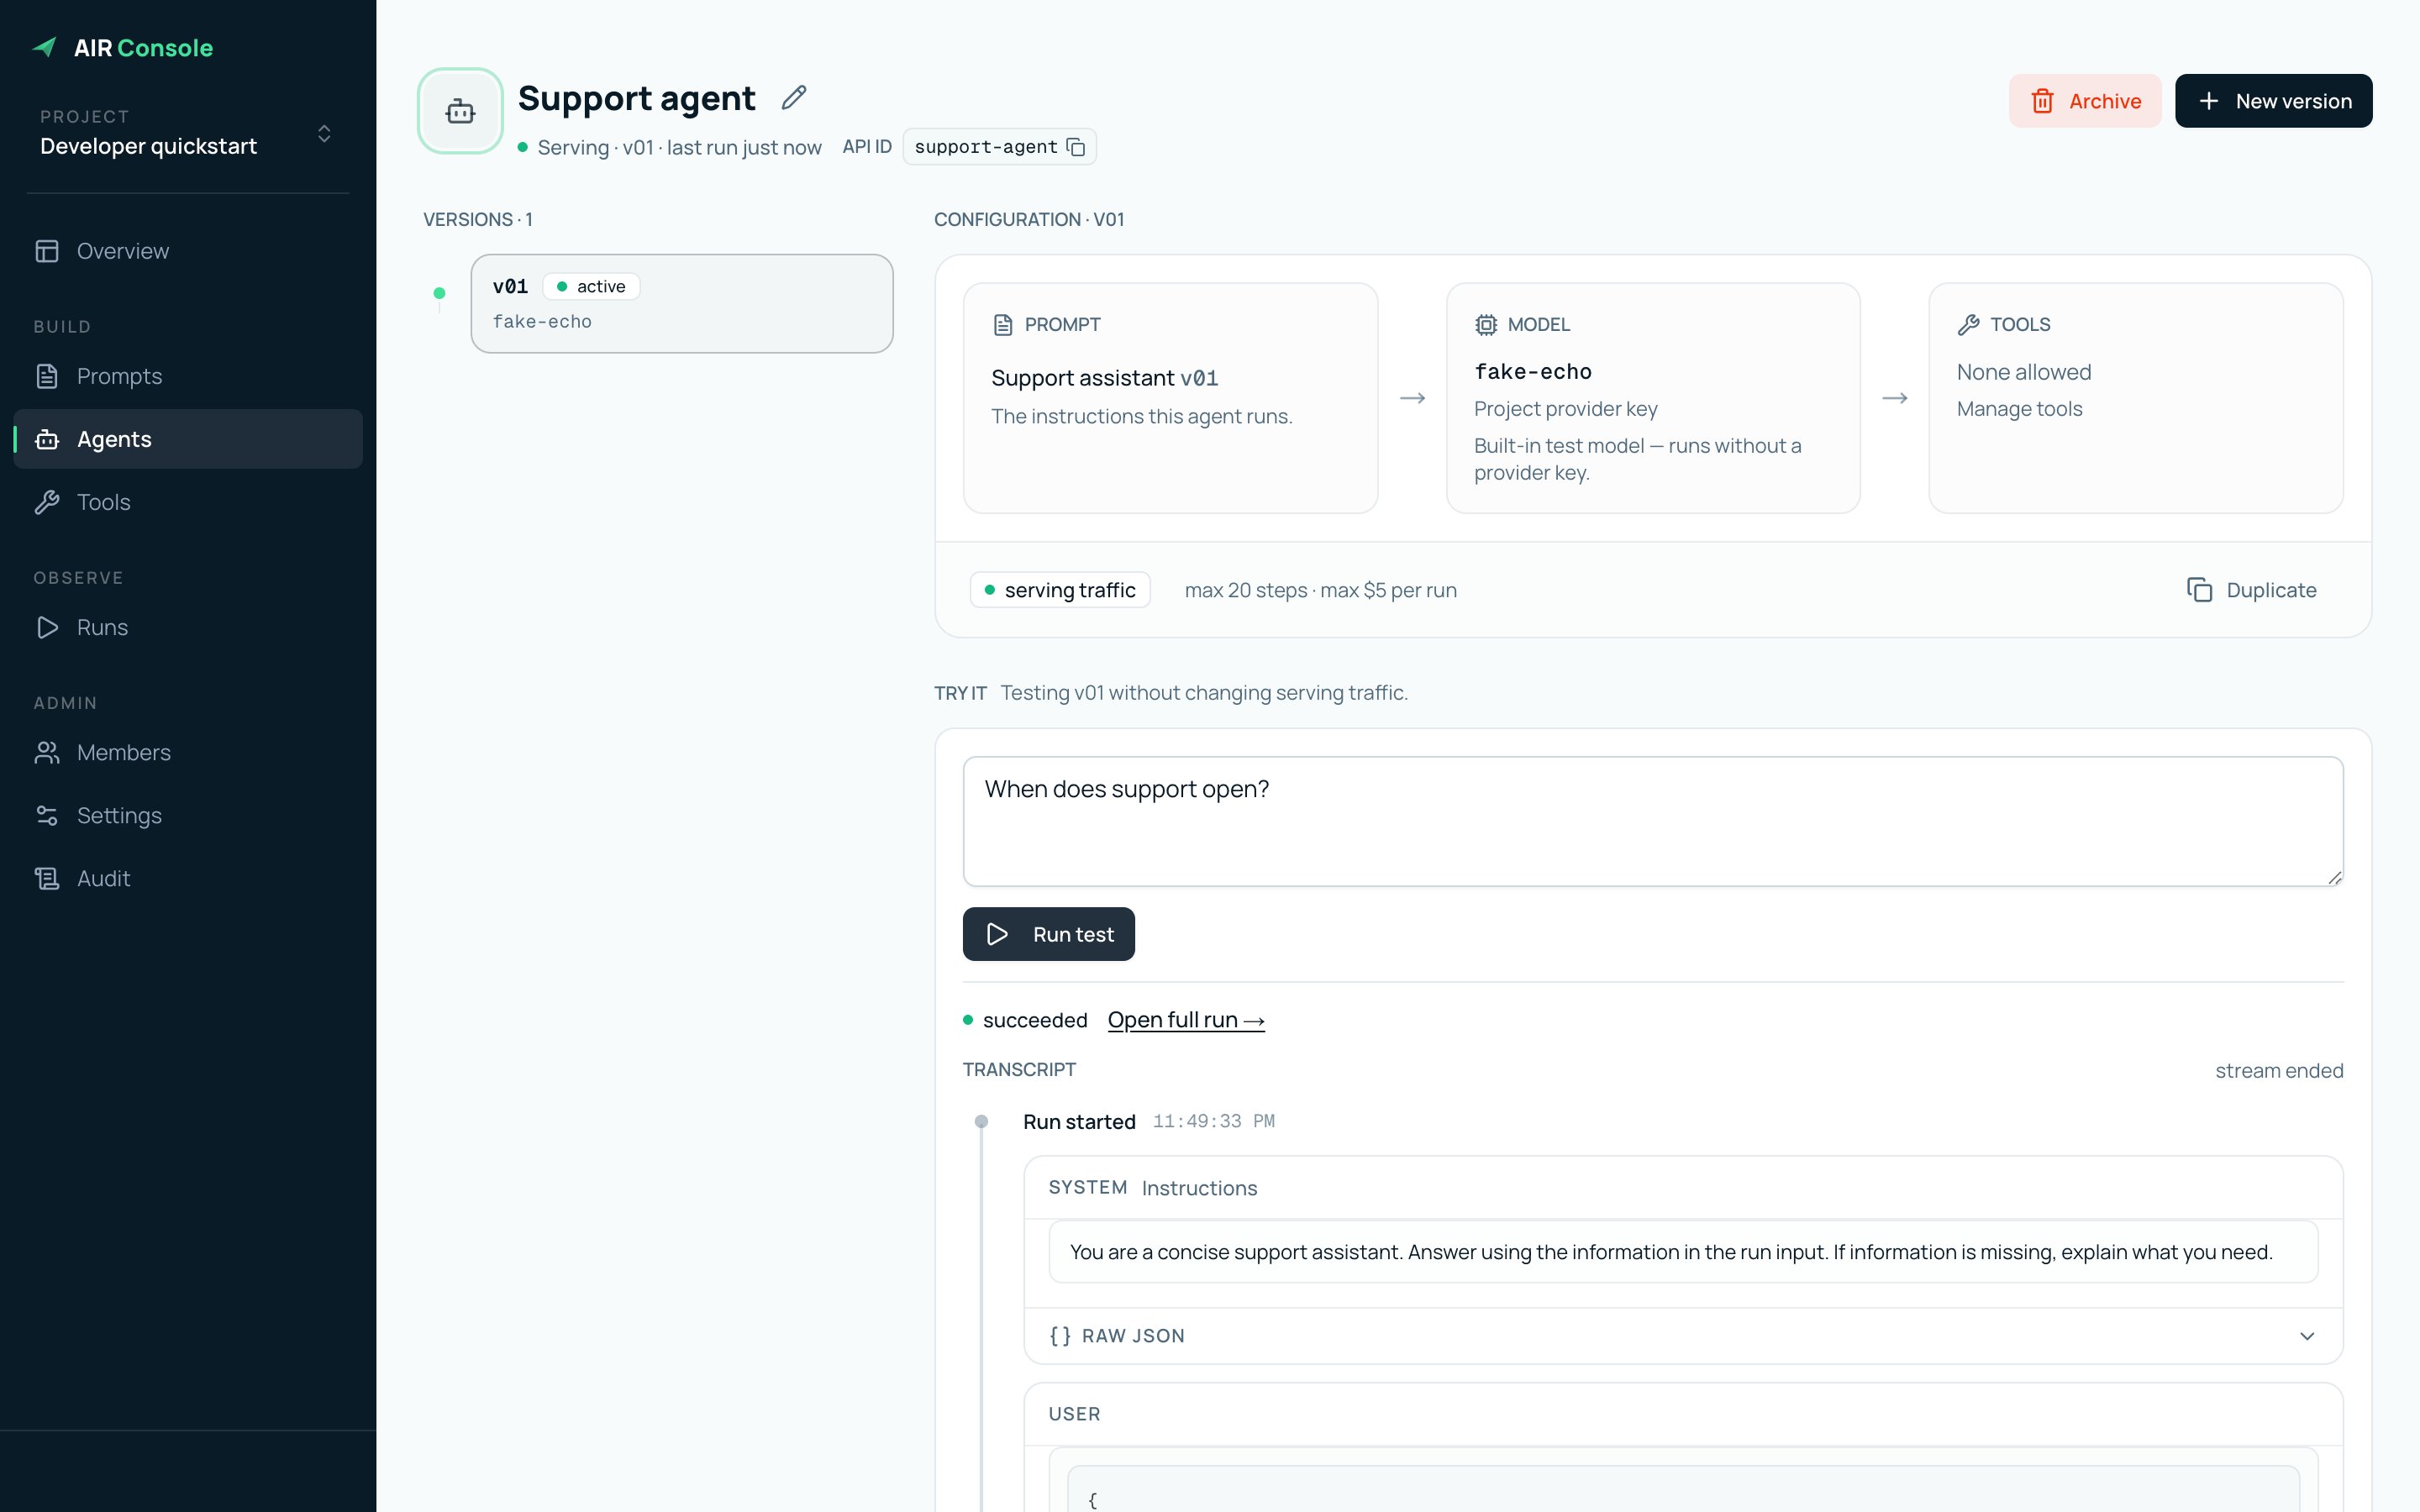 Select **Open full run**. The trace shows the exact agent and prompt
versions, token usage, cost, model latency, request, response, and immutable
configuration snapshot.
Select **Open full run**. The trace shows the exact agent and prompt
versions, token usage, cost, model latency, request, response, and immutable
configuration snapshot.
 Open **Settings** and select **Issue app key**. Copy the key once into your
local environment or secret manager. Do not put it in source control.
Open **Settings** and select **Issue app key**. Copy the key once into your
local environment or secret manager. Do not put it in source control.
 Install the published SDK:
```bash theme={null}
python -m pip install papermap-air
export AIR_BASE_URL="https://dev.airapi.papermap.ai"
export AIR_APP_KEY=""
```
Copy the agent API ID from the agent page and use it as `agent_id`:
```python theme={null}
import asyncio
import os
from air import AirClient
async def main() -> None:
async with AirClient(
os.environ["AIR_BASE_URL"],
os.environ["AIR_APP_KEY"],
) as client:
run = await client.runs.create(
agent_id="support-agent",
input={"message": "When does support open?"},
context={"tenant_id": "demo"},
)
result = await client.runs.wait(run.id, timeout=120)
print(result.status, result.output)
asyncio.run(main())
```
You now have a project, versioned instructions, an active agent, a successful
trace, and application access. Next, [connect a private worker](/air/workers/create-worker).
Install the published SDK:
```bash theme={null}
python -m pip install papermap-air
export AIR_BASE_URL="https://dev.airapi.papermap.ai"
export AIR_APP_KEY=""
```
Copy the agent API ID from the agent page and use it as `agent_id`:
```python theme={null}
import asyncio
import os
from air import AirClient
async def main() -> None:
async with AirClient(
os.environ["AIR_BASE_URL"],
os.environ["AIR_APP_KEY"],
) as client:
run = await client.runs.create(
agent_id="support-agent",
input={"message": "When does support open?"},
context={"tenant_id": "demo"},
)
result = await client.runs.wait(run.id, timeout=120)
print(result.status, result.output)
asyncio.run(main())
```
You now have a project, versioned instructions, an active agent, a successful
trace, and application access. Next, [connect a private worker](/air/workers/create-worker).